 |
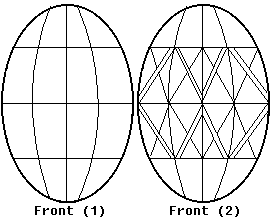
Front (1). First, you must divide the egg into sixteenths. You
draw a line around the length of the egg, then another line at a
right angle to it. Then you repeat the process at a 45 degree angle to
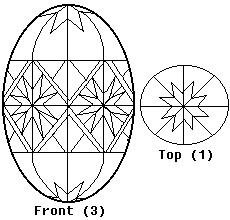
the lines already there (Top 1 can be used as a guide to
how it should look--but you draw the rose on later). Next, draw a
line around the middle. Now the egg is divided into sixteenths.
Draw two lines parallel to the middle line.
Front (2). At this point, draw a set of interlocking diamonds
on the egg, as shown.
|
 |
Front (3). Finally, draw in the roses, on the front/back,
and on the top/bottom.
When you have completed this, dip the egg in the Yellow
dye. Leave it in for about 15 minutes, or until the desired
shade is reached (REMEMBER, NO LONGER THAN 45 MINUTES!).
Then remove the egg, and dab it dry.
|

