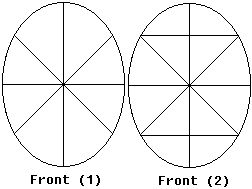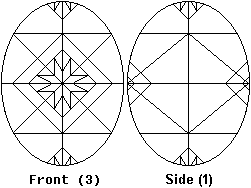
Front (1). First, you must divide the egg into sixteenths. You draw a line around the length of the egg, then another line at a right angle to it. Then you repeat the process at a 45 degree angle to the lines already there. Next, draw a line around the middle. Now the egg is divided into sixteenths.
Front (2). Draw two horizontal lines, parallel to the main dividing horizontal line.

Side (1). This is what the side of the egg should look like currently.

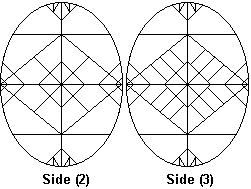
Side (3). Draw lines parallel to the diagonal dividing lines, as shown.
When you have completed this, dip the egg in the Yellow dye. Leave it in for about 15 minutes, or until the desired shade is reached (REMEMBER, NO LONGER THAN 45 MINUTES!). Then remove the egg, and dab it dry.