Ukrainian Recipes: How to Assemble Pirohy (Perogies/Varenyky)

Start off with a dough circle.

Pile high with cheese/potato filling.

Placing the pastry circle in the palm of your hand, smush the filling down to the edges of the pastry, using your other hand. Pull gently from the center of the dough underneath, out to the edges, to accomplish this.

Finished smushing filling down, and drawing out the circle.

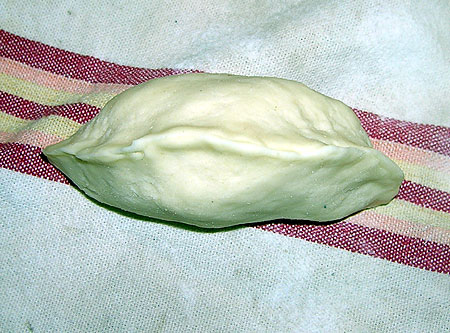
This will inevitably create an oval shape. To counteract this, fold the dough over as in the diagram, bringing the two red dots together. This will give you a nice pillow shape. Otherwise, if you fold it the opposite way, you end up with more of a "tube" shape - not as pretty, and how I used to make them all the time, till I asked Mom, and she told me how Dido used to make them. :D

Now you can see the pillow shape taking form. Above, I've started the pinching process, where you pinch the raw dough edges together. Make sure they're nice and firmly pressed together, you don't want them to come apart in the boiling water!

And now, here you can see the finished pirohy. Firmly pinched on the edges, and no holes in the dough where it might have worn thin (double check that before you put it in the water). Below, you'll see the pirohy from another angle.